選択肢(choices)の使い方:Almightに触れる6
画像と文字が表示されるようになったので、次はシナリオが進んで選択肢を表示するようにしてみます。
使用する画像はフリー素材をしようします。
びたちー素材感 URL http://www.vita-chi.net/sozai1.htm
ゆんフリー者新素材集 URL http://www.yunphoto.net
選択肢の使い方は、Almightのチュートリアルに記載されています。
シナリオの任意の場所に * をつけることでそこへジャンプするようにできるようです。
*select のように * の後に自分にとってわかりやすい文言をつけていけばよいというわけです。
この *select のように目印になるものを、ラベルといいます。
そしてそこにジャンプするか選ぶ選択肢部分は choices タグを使います。
@choices target1="" text1="" target2="" text2=""
という具合に書いていけばいいらしいです。
試しにかいてみると
@choices target1="*select1" text1="選択肢1" target2="*select2" text2="選択肢2"

*select1
選択肢1です。

*select2
選択肢2です。
という具合です。
選択肢の数を増やすには
@choices target1="" text1="" target2="" text2="" target3="" text3="" target4="" text4=""
という具合に数字を増やしていけばいくらでも表示することができます。
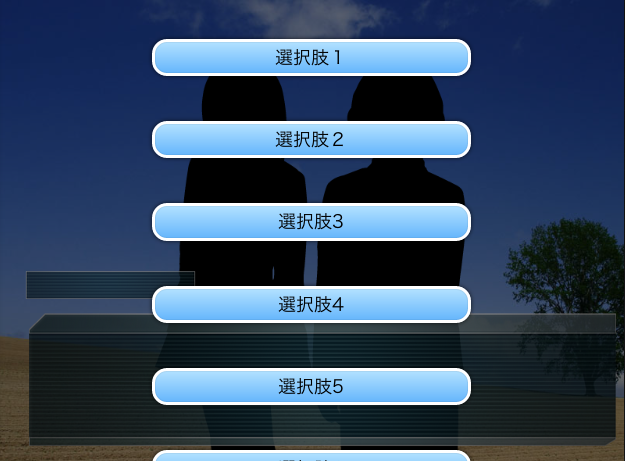
ですが、あまりに数を増やすと
こうんな風にはみ出して表示されてしまいます。
また、
@choices target1="*select1" text1="ああああああああああああああああああああああああああ"
のように文字を長くしてしまうと
文字がはみ出して表示されてしまいます。
そのため、選択肢の設定を修正する必要があります。
lib フォルダの中の config フォルダに user.style.css というファイルがあるので、それをエディターで開きます。
すると
/*
* UI 選択肢
*/

#almight-choices-window .box {
  display: table-cell;
  vertical-align: middle;
}

.ui_choices {
  width: 400px;
  height: 40px;
  margin: 2.5em auto;
  color: #000;
  font-size: 1.15em;
  text-align: center;
  text-shadow: 1px 1px 0 rgba(255,255,255,0.5);
  line-height: 40px;
  cursor: pointer;
  border: 4px solid #fff;
  border-radius: 20px;
  background: rgb(178,225,255);
  background: -moz-linear-gradient(top,  rgba(178,225,255,1) 0%, rgba(102,182,252,1) 100%);
  background: -webkit-gradient(linear, left top, left bottom, color-stop(0%,rgba(178,225,255,1)), color-stop(100%,rgba(102,182,252,1)));
  background: -webkit-linear-gradient(top,  rgba(178,225,255,1) 0%,rgba(102,182,252,1) 100%);
  background: -o-linear-gradient(top,  rgba(178,225,255,1) 0%,rgba(102,182,252,1) 100%);
  background: -ms-linear-gradient(top,  rgba(178,225,255,1) 0%,rgba(102,182,252,1) 100%);
  background: linear-gradient(to bottom,  rgba(178,225,255,1) 0%,rgba(102,182,252,1) 100%);
  -webkit-box-shadow: inset 0 1px 2px rgba(0,0,0,0.3) ,0 1px 8px rgba(0,0,0,0.7);
  box-shadow: inset 0 1px 2px rgba(0,0,0,0.3) ,0 1px 8px rgba(0,0,0,0.7);
}
という部分があります。
この部分を編集すればはみ出している部分もまともに表示することができます。
まずは文字がはみ出ているので
width: 400px;
を
width: 600px;
にします。
それと選択肢同士の間隔が広いために下にはみ出しているので
margin: 2.5em auto;
を
margin: 1em auto;
と変更します。
こんな風に、user.style.css の中を弄ってみれば色々と変更できるみたいですね。


